도안 목록으로 돌아가기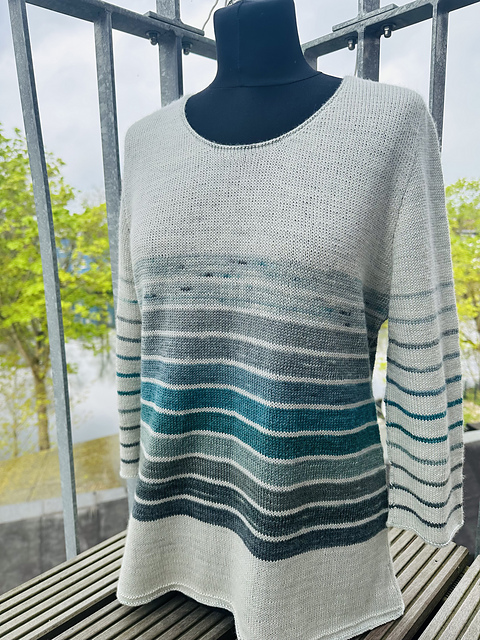
 무료
무료 무료
무료
 무료
무료

Pullover유료 도안
Against the tide
디자이너: Anke Telschow
난이도5.3
바늘 크기
3mm
(3호)
실 굵기보통 가는 실 (4합)
(Light Fingering)
(Light Fingering)
좋아요600
ADVERTISEMENT
도안 상세 설명 구글번역기로 번역하기
Two different introduction offers until Sunday, 15th of June, midnight Eastern time:
- Either get **30% off** (no coupon code needed)
or
- Buy this pattern at its regular price and **get pattern "Two of us" for free** (which **also features a sleeve cap**, but worked from the **bottom up** - the beginning is easier, and if the short-row technique for the sleeve caps seems to complicated, you can decide to decide the sleeves separately and sew them in, which is also decribed in the pattern) - with coupon code "Two_sleeve_caps")
-------------------------------------------------------
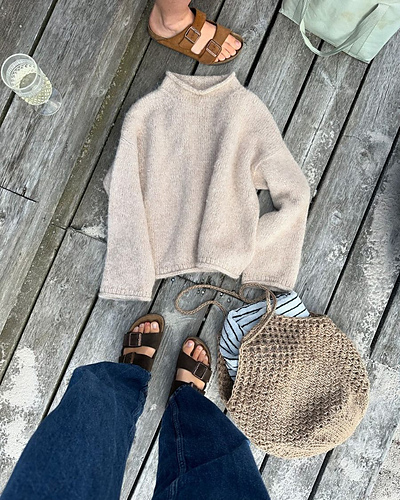
Nowadays, with all those easy-to work dropped-shoulder summer shirts around, there seems to be not much interest for **sleeve caps**. However, I still think that a well-fitting sleeve cap gives a garment the perfect shape – no unwanted bulk at the underarm. This is why I have resumed the old-fashioned way – and finally came up with a **top-down solution** where you **neither have to sew nor pick up sts from the armholes**. **The sleeve cap** (after picking up a few initial sts once) **is worked at the same time as the upper body,** but some **short rows** leave out the sleeves, so its longer edge with the sleeve increases matches the shorter edge of the body.
*This document is a complete pattern in itself, but it’s also a recipe for working a fitting upper body. On the lower body, you can do whatever you like.*
**Needles:** Main needle size is **3,0mm**; 2,5 mm and 2,0mm for edges.
**Gauge: 28 sts x 38 rows** in Stockinette after blocking.
Approx. **1000/ 1100/ 1200/ 1300/ 1400/ 1500 m** of a Fingering weight yarn needed. For my sample, I used leftovers of the (sadly discontinued) Skudderia Pinta (60% Merino, 20% Silk, 20% Ramie; 425m/100g).
The shirt should fit at the shoulders – you could work more increases later if you need additional bust width.
*Worked at a gauge of 2 sts less on 10cm, the piece will get one size bigger.*
**Overview:** These are the steps to work the shirt, **top-down**:
• Step 1: Work shoulder pieces (using short rows for shoulder slant), picking up sts for front pieces from back pieces. Join back pieces first and work a few rows, then some rows on fronts. Join everything into a long row by picking up sts for sleeve caps. After the front neck is done, close to round. Shape sleeve cap with increases, while purl sts between body and sleeves create a visible dividing line. By working occasional short rows on body only, you ensure that the sleeves will not tear at the body.
• Step 2: Separate into body and sleeves. Work lower body with big CC stripes; end with a small rolling edge.
• Step 3: Work sleeves in the same color sequence, but with small CC stripes.
• Finishing: Add neck edge.
*(This pattern was created for the more experienced knitters. But as it is described step-by-step, an ambitious beginner could follow it as well. The upper body needs concentration, but the lower body and sleeves are a relaxing knit.)*
* 이 도안은 유료이므로 Ravelry에서 별도 구매가 필요합니다.
비슷한 느낌의 도안들
옆으로 밀어서 보기 →Seven Summers
by Melanie Berg
무료Classic Knitted Sweater
by BC Cardigans
무료Le pull Soleil
by Juliette Supiot
Relief Sweater
by Natalja Ledvanova
무료Step by Step Sweater
by Florence Miller
Kua Mi
by Hilde Morseth
Olga Sweater
by PetiteKnit
Ranunculus
by Midori Hirose
The Winter Lamb Sweater
by Ashley Weeks Cart
Cloud Sweater
by PetiteKnit