도안 목록으로 돌아가기


Tee유료 도안
Amaia
디자이너: Esti Juango
난이도5.8
바늘 크기
4mm
실 굵기중간 실 (6~8합)
(DK (11 wpi))
(DK (11 wpi))
좋아요926
ADVERTISEMENT
도안 상세 설명 구글번역기로 번역하기
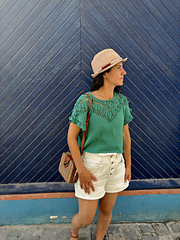
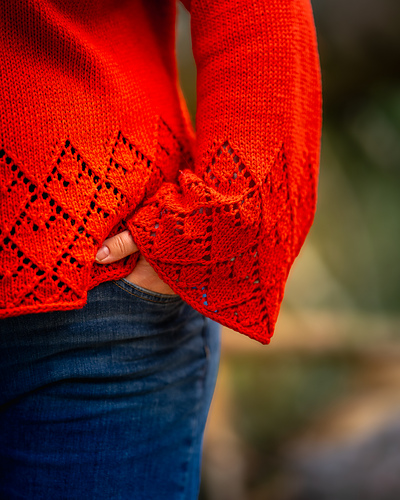
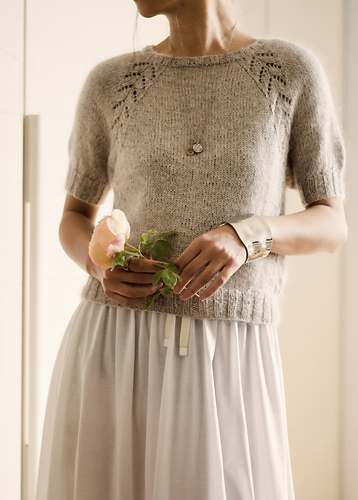
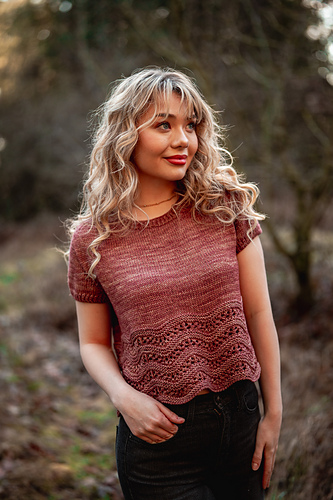
Lacework romantic summer tee.
Español abajo/ Spanish below
**Inspiration**
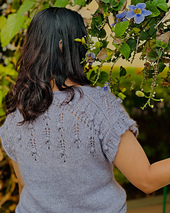
The summer and knitting gives us the opportunity to wear unique garments, adorned with openwork so that they become our second skin. As if it were a necklace, the upper part of this garment, both front and back, is encompassed with openwork and bobbles that are repeated harmoniously.
**Difficulty Level**
Intermediate
*Pattern has been tech edited and tested.*
**What do you need to know?**
To knit and purl, increase and decrease. To work in the round and flat. The back and front are charted and includes row by row instructions. Support videos are provided for some stitches and techniques.
**Sizes**
1 (2, 3, 4, 5, 6, 7, 8, 9) with final bust circumference measurement of the tee after blocking of 91 (100, 112, 121, 131, 140, 152, 161, 171) cm/ 36.5 (40, 44.75, 48.50, 52.5, 56, 60.75, 64.5, 67.25)”. A positive ease of 10-15 cm/ 4-6” is recommended.
**Materials**
- Yarn: Katia Cotton-Yak– 50gr; 130m (142yds). 60% cotton, 30% wool, 10% yak. Color 122.
- Amount: 4 (5, 5, 6, 7, 8, 9, 10, 11) skeins of 50 gr
- Total in m: 520 (650, 650, 780, 910, 1040, 1170, 1300, 1430) m
- Total in yds: 568 (710, 710, 852, 994, 1136, 1278, 1420, 1562) yds
- 4 mm (US 6) circular needles for top
- 3,5 mm (US 4) circular needles for neckline finishing
- 4 mm crochet hook for the bobbles
- 4 Locking markers
- Waste yarn or stitch holders
- Tapestry needle
**Gauge**
In a 10x10 cm (4x4 in) gauge you should have 17 sts and 25 rows worked in the round in Stockinette stitch pattern. Block the swatch for measuring.
**Construction notes**
The top starts at the back. It is knitted starting at the back of the neck and working down to the armhole. The stitches are picked up to knit the front from top-down. Neckline is shape while knitting lacework chart to the armhole.
Front and back are joined and worked in the round to desired length. The neck and arm openings are finished off. The pattern consists of the following sections:
Back
1.1 Cast on to back width
1.2 Straight knitting for the armhole
Front
2.1 Left front shoulder
2.2 Right front shoulder
2.3 Join fronts
Join back and front. Work in the round
Finishings
-----Español/ Spanish-----
**Inspiración**
El verano y el tejido nos brinda la oportunidad de lucir prendas únicas, adornadas con calados para que se convierten en nuestra segunda piel. Como si de un collar se tratara esta prenda acompaña toda su parte superior tanto el delantero y trasero con un diseño de calados y bodoques que se repiten armónicamente.
**Nivel de Dificultad**
Intermedio
*El patrón ha sido editado técnicamente y testeado*
**Requisitos previos**
Saber tejer derecho, revés, hacer aumentos y disminuciones por el lado derecho y revés de la labor. Tejer en circular. Se incluye un esquema del calado del delantero y trasero por tallas. También las instrucciones escritas del esquema. Hay una descripción detallada de cada punto y videos de apoyo.
**Tallas**
1 (2, 3, 4, 5, 6, 7, 8, 9) con contorno de pecho en prenda bloqueada de 91 (100, 112, 121, 131, 140, 152, 161, 171) cm. Se recomienda una holgura positiva de unos 10-15 cm.
**Materiales**
- Hilo: Katia Cotton-Yak– 50gr; 130m (142yds). 60% Algodón, 30% Lana, 10% Yak. Color 122.
- Cantidad: 4 (5, 5, 6, 7, 8, 9 ,10, 11) ovillos
- Total en m: 520 (650, 650, 780, 910, 1040, 1170, 1300, 1430) m
- Agujas circulares de 4 mm para el top
- Agujas circulares de 3,5 mm para el cuello
- Ganchillo de 4mm para los bodoques
- 4 marcadores tipo imperdible
- Imperdible o hilo adicional para dejar puntos en espera
- Aguja lanera
**Tejido de Muestra**
En una muestra tejida en plano de 10 x 10 cm en el punto del calado bloqueada obtendrás 17p por 25 Pas con una aguja de 4 mm.
**Notas de construcción**
El top se inicia en la parte trasera. Se teje iniciando en la parte trasera del cuello hacia abajo hasta llegar a la sisa. Se recogen los puntos para tejer la parte delantera de arriba abajo. Se da forma al escote y se trabaja el calado simultáneamente hasta llegar al bajo de la sisa.
Se une el delantero y trasero y se trabaja en circular hasta la longitud final deseada. Se remata el cuello y las aberturas de los brazos.
El patrón consta de las siguientes secciones:
Trasero
1.1 Montaje de puntos hasta anchura final trasero
1.2 Tejido recto para zona del brazo
Delantero
2.1 Hombro delantero izquierdo
2.2 Hombro delantero derecho
2.3 Unión delanteros hasta sisa
Unión delantero y trasero. Tejer en circular
Acabados
* 이 도안은 유료이므로 Ravelry에서 별도 구매가 필요합니다.
비슷한 느낌의 도안들
옆으로 밀어서 보기 →Black Sparkle Tee Knit
by zzaim knitting
Kauri Tee
by Skeinny Dippin
Crystal Creek Tee
by Anniina Juuti
Tolsta Tee
by Rebecca Clow
Polo ONE
by Sylvia Heidinger
Lauro Sweater
by Minimi Knit Design
Nilles Mosaik Bluse
by Pernille Koustrup
Blouse No. 1
by My Favourite Things
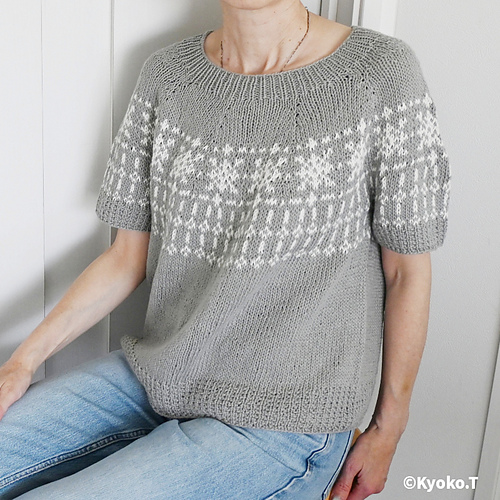
Boat Trip Tee
by Kyoko Tachikawa
Cloudbreak Tee
by Wool & Pine