도안 목록으로 돌아가기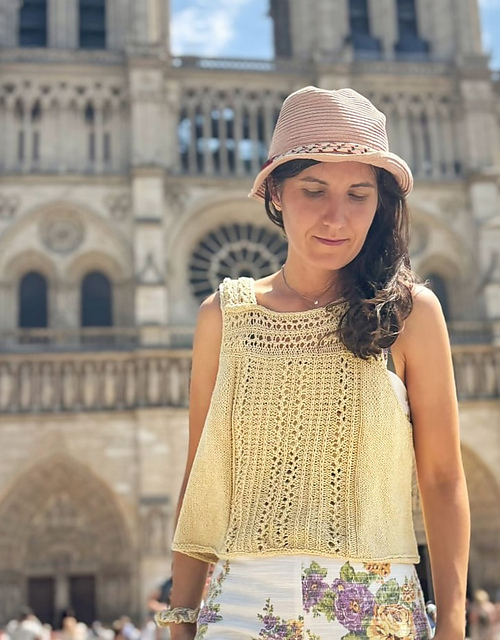
Tank/Camisole유료 도안
Kurruf
디자이너: Esti Juango
난이도0.0
바늘 크기
3.5mm
실 굵기약간 굵은 실 (10합)
(Worsted (9 wpi))
(Worsted (9 wpi))
좋아요311
ADVERTISEMENT
도안 상세 설명 구글번역기로 번역하기
**Inspiration**
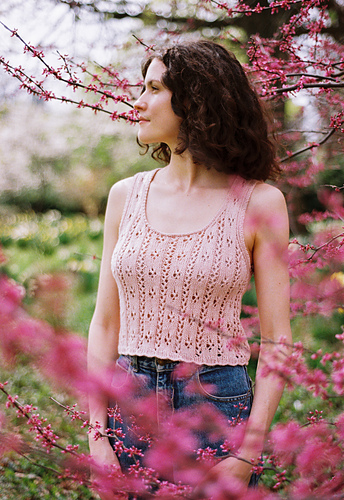
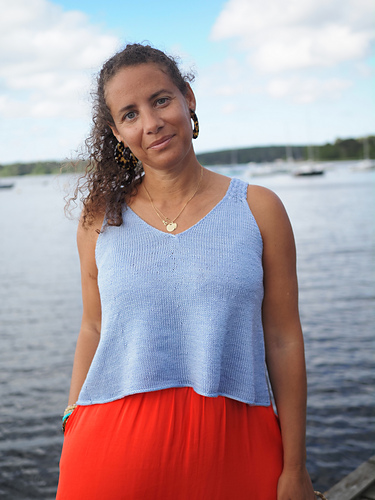
In Mapudungun, the indigenous Chilean language, Kurruf means ‘breeze’. Inspired by the movement of the air: sometimes gentle and constant, sometimes unpredictable and strong. Like the wind, the design has rhythm and fluidity, with shapes that suggest movement in various directions and lightness.
**Difficulty Level**
Adventurous beginner - Intermediate.
*Pattern has been tech edited and tested.*
You can check a video with the construction [here.][1]
**What do you need to know?**
To knit and purl, increase and decrease. To work in the round and flat. Support videos are provided for some stitches and techniques.
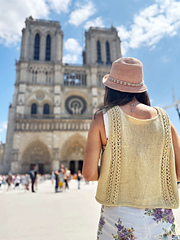
**Sizes**
1 (2, 3, 4, 5) (6, 7, 8, 9) with final bust circumference measurement of the top after blocking of 82 (92, 102, 112, 122) (132, 142, 152, 162) cm. 32.25 (36.25, 40.25, 44, 48) (52, 56, 59.75, 63.75)”. A positive ease of 10-15 cm/ 4-6” is recommended.
**Materials**
- Yarn: Concept Katia, Silk-Viscose. 50 gr; 110 m (120 yds). 50% silk, 50% viscose. Color: 52. Worsted yarn
- Amount: 4 (4, 4, 5, 5) (6, 6, 7, 8) balls
- Total in m: 440 (440, 440, 550, 550) (660, 660, 770, 880) m
- Total in yds: 480 (480, 480, 600, 600) (720, 720, 840, 960) yds
- 3,5 mm (US 4) circular needles
- 8 markers
- Similar size hook for the provisional cast on
- Waste yarn or stitch holders
- Tapestry needle
**Gauge**
In a 10x10 cm (4x4 in) gauge you should have 17.5 sts and 27 rounds worked in Stockinette Stitch. Block the swatch for measuring.
In a 10x10 cm (4x4 in) gauge you should have 22 sts and 36 Row worked flat in strap pattern. Block the swatch for measuring.
**Construction notes**
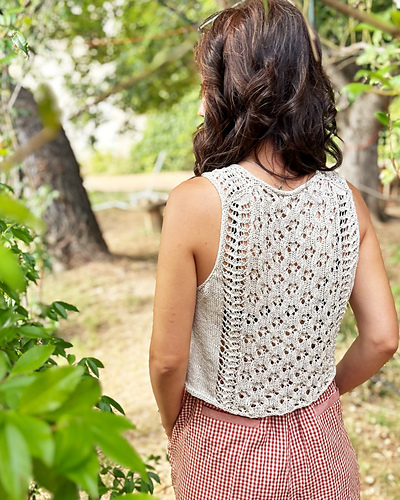
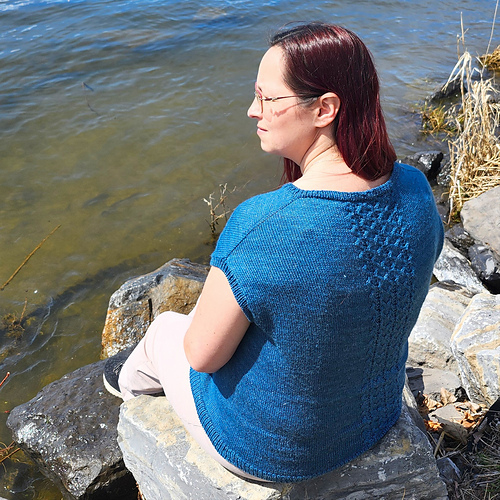
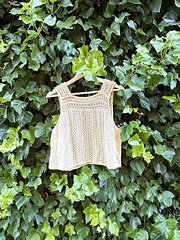
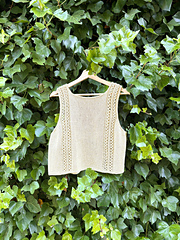
The garment begins with the shoulder straps, knitted from front to back. After casting on the center back stitches, the back is worked flat to the armhole.
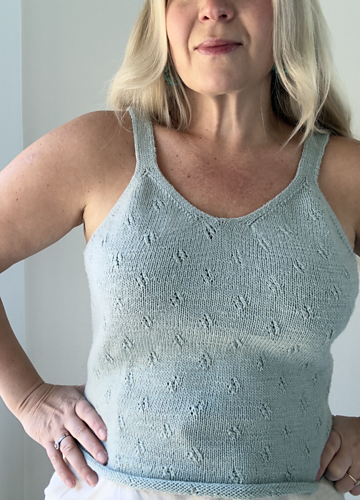
Next, the Openwork Valance is knitted on the front. The i-cord-edged straps are joined to this border, and stitches are picked up to knit the front to the armhole.
Front and back are then joined, underarm stitches are picked up, and the body is worked in the round to the desired length. I-cord edging is added to the armholes and front neckline as you go.
The sections of the pattern are illustrated in the diagram below:
1. Straps
2. Back to armhole
3. Front, Openwork Valance, Front to armhole
4. Joining front and back. Circular knitting
*-----Español/ Spanish-----*
**Inspiración**
En mapudungun, lengua indígena chilena, Kurruf significa “brisa”. Inspirado en el movimiento del aire: a veces suave y constante, otras veces impredecible y fuerte. Como el viento, el diseño tiene ritmo y fluidez, con formas que sugieren movimientos en varias direcciones y ligereza.
**Nivel de Dificultad**
Fácil - Intermedio.
*El patrón ha sido editado técnicamente y testeado.*
**Requisitos previos**
Saber tejer derecho, revés, hacer aumentos y disminuciones por el lado derecho y revés de la labor. Tejer en circular. Hay una descripción detallada de cada punto y videos de apoyo.
Puedes echar un vistazo a la construcción en [este vídeo][1].
**Tallas**
1 (2, 3, 4, 5) ( 6, 7, 8, 9) con contorno de pecho en prenda bloqueada de 82 (92, 102, 112, 122) (132, 142, 152, 162) cm. Se recomienda una holgura positiva de unos 10-15 cm.
**Materiales**
- Hilo: Concept Katia, Silk-Viscose. 50 gr; 110 m (120 yds). 50% seda, 50% viscosa. Color: 52
- Cantidad: 4 (4, 4, 5, 5) (6, 6, 7, 8) ovillos
- Total en m: 440 (440, 440, 550, 550) (660, 660, 770, 880) m
- Agujas circulares de 3,5 mm para el top
- 8 marcadores
- Un ganchillo para el montaje provisional
- Imperdible o hilo adicional para dejar puntos en espera
- Aguja lanera
**Tejido de Muestra**
En una muestra tejida en circular de 10 x 10 cm en punto jersey obtendrás 17,5 puntos por 27 vueltas con una aguja de 3,5 mm. Bloquea la muestra para poder medirla.
En la muestra del caldo del tirante tejido en plano obtendrás 22p por 36 Pas.
**Notas de construcción**
La prenda se inicia tejiendo los tirantes de delante hacia atrás. Una vez concluidos, se montan los puntos centrales de la parte trasera y se teje la parte trasera en plano hasta llegar a la sisa.
Antes de unir la parte delantera se trabaja la Cenefa de calados horizontal delantera. Se unen los tirantes con su borde i-cord a la Cenefa delantera y se recogen puntos para tejer el delantero hasta la sisa.
Se unen delantero y trasero, montando puntos en el bajo sisa y se teje en circular hasta la longitud deseada.
En la sisa y en el cuello delantero habrá una terminación en i-cord que se va creando conforme lo vas tejiendo.
El patrón consta de las siguientes secciones. Representadas en el esquema de abajo:
1. Tirantes
2. Trasero hasta sisa
3. Delantero, Cenefa horizontal calados, Delantero hasta sisa
4. Unión delantero y trasero. Tejer en circular
[1]: https://www.instagram.com/reel/DWbnQVaCKv2/
[2]: https://www.instagram.com/reel/DWbnQVaCKv2/
* 이 도안은 유료이므로 Ravelry에서 별도 구매가 필요합니다.