도안 목록으로 돌아가기


Hat유료 도안
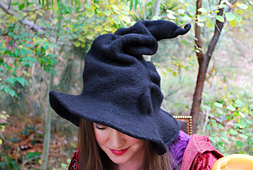
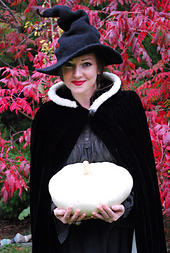
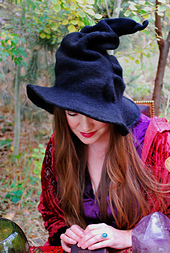
a practical witch hat
디자이너: tiny owl knits
난이도2.2
바늘 크기
6mm
(13호)
실 굵기약간 굵은 실 (10합)
(Worsted (9 wpi))
(Worsted (9 wpi))
좋아요5588
ADVERTISEMENT
도안 상세 설명 구글번역기로 번역하기
This pattern is available individually, or you can get it in the ebook:
**The Witch & Wizard Academy Primer Year 1**
5 patterns & 5 classes with mini magic lessons! ♥
Patterns included in this e-book are:
1. Professor Meow-gona-cowl (Transfiguration Class)
2. A Practical Witch Hat (Potions Class)
3. Broom Riders (Flying Class)
4. Moon Phase Scarf (Astronomy Class)
5. History of Magic Book Bag (History of Magic Class)
Welcome to Witch & Wizard Academy! You are in **Potions Class.** As part of your lesson, you will be making a very practical witch hat. I think you’ll find this hat quite handy to wear as you mix your own special blends, brews and potions.
**Owl Experience Level:** one OWL (beginner)
**Sizes:**
Child 19” head circumference
Adult 22” head circumference
If directions differ, Adult size will be in parentheses.
**Finished measurements:** measured pressed flat.
CHILD:
Before felting: 19” wide (at widest part of brim) x 27” high.
After felting: 12” wide (at widest part of brim) x 17” high.
ADULT:
Before felting: 24” wide (at widest part of brim) x 33” high.
After felting: 15” wide (at widest part of brim) x 22” high.
**Yarns used:** Worsted weight wool such as:
Cascade 220, 100 g - 220 yds - 200 m, 100% Peruvian Highland Wool.
MC: BLACK color # 8555 - 2 skeins
NOTE: hat is felted in the washing machine so be sure to get something that is 100% wool or other animal fiber. (Though please note that other animal fibers will felt differently.)
**Tension/gauge:**
Before felting: Work 16 sts and 20 rows to measure 4x4”
in St stitch using US 10 or 6 mm needles.
After felting, work will shrink down to about 20 sts & 24 rows in 4x4”. Use needles necessary to get gauge.
**Notions:**
A pair of US 10 (6 mm) circular needles 24” long,
A set of US 10 (6 mm) dpns,
stitch markers, tapestry needle. Optional: enough wire to go around the outer brim of hat. The hat doesn’t need to be wired. The first picture in pattern shows hat wired, the second pic shows not wired. If you go for the wired option get a needle & matching thread too. (The wire is simply whipstitched along the top edge of the brim.)
**Tiny owl stitch dictionary:**
dpns: double pointed needles
i-cord: knit sts. Don’t turn work. Slide work down to other end of dpn. Bring yarn around back and knit sts again.
k: knit
k2tog: knit the next two stitches together.
MC: main color
pm: place marker
St st: stockinette/stocking stitch. k a row, purl a row.
st(s): stitch(es)
(WS): wrong side
* 이 도안은 유료이므로 Ravelry에서 별도 구매가 필요합니다.
비슷한 느낌의 도안들
옆으로 밀어서 보기 →DATURA HAT
by Veta Romanenkova
Mad Hatter’s Topper
by Nim Teasdale
Nordkatt hat
by CosyCat Studio
A Little More Spark Hat
by Melanie Berg
Winterberry Bucket Hat
by Tatsiana Matsiuk
Ilu Hat
by Eva Miehe
Ruslelua
by Anja HS Hansen
Frostberry Hat
by Tania Barley
Shady Bucket Hat
by Wool & Beyond
Global Shift Hat
by Lotta H Löthgren