도안 목록으로 돌아가기
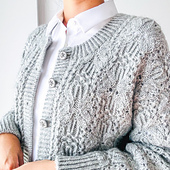
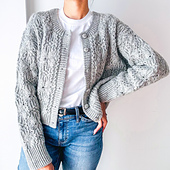
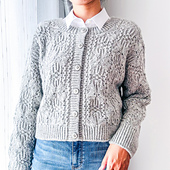



Cardigan유료 도안
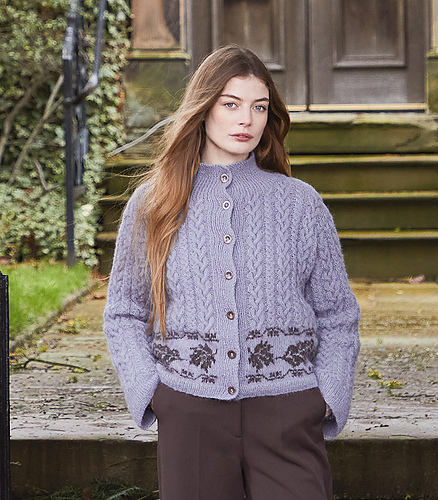
SPRING cardigan
디자이너: Ngo Quynh
난이도6.8
바늘 크기
4mm
실 굵기중간 실 (6~8합)
(DK (11 wpi))
(DK (11 wpi))
좋아요996
ADVERTISEMENT
도안 상세 설명 구글번역기로 번역하기
> **Check [my designs page][1] to see the latest promotion codes! **
[1]: https://www.ravelry.com/designers/ngo-quynh
This is a "crazy" pattern, which contains 62 pages, include both charts & written instruction each rows each sts. Every size has it’s own detailed written “chapter”.
> **#springcardigan #qqyarnover**
*SPRING cardigan is designed based on the stitch pattern no# 86 from Knitting Pattern Book 250 Stitch by Hitomi Shida. I’m always a big big fan of Hitomi Shida sensei and her knitting stitch bible books. Honestly, I was obsessed with this motif from the first time I saw it. This motif reminds me of flowers and butterflies, evoking a strong feeling of Spring and it makes me happy whenever I saw it. Such a powerful and meaningful stitch!*
*At first I thought of knitting this cardigan in bright colors and creating an airy lace fabric. Then I changed my mind to knit it in a stone color that reflects the Winter atmosphere, using a classic wool that gives it a thick and sturdy fabric. It’s fun to wear a hand-knitted sweater that gives you a warm and cozy feeling in Winter AND it reminds you that after a long cold Winter will come Spring, right? That is to always keep the faith, then flowers will bloom on the top of the rock, and our lives will get better and better.*
**Lace stitching patterns all over the cardigan, there are no plain stockinette stitches on this cardigan. To be honest, it took me a lot of effort to design this pattern.**
*The SPRING cardigan is constructed from the top down and is worked flat and in the round. You can try on your unfinished garment whenever you need to decide on the desired length or when you want to to enjoy the results of your hard work.*
**Experience level**
Intermediate
**Techniques used**
Working in the round
Knitting and purling
Increasing and Decreasing
Reading chart OR follow written instruction
Picking up stitches along edges
**Size**
1 (2, 3, 4) fit to chest circumference 75-85.5 (85.5-105.5, 104-124, 118.5-138.5) cm/ 30-34 (34-42, 41.5-49.5, 47.5-55.5)”
**Measurements**
Finished bust circumference: 105.5 (125.5, 144, 158.5) cm / 42.5 (50, 57.5, 63.5)” including the intended positive ease of 20-30 cm [8-12”]
Length from hem to underarm (adjustable): 22 cm [9”]
Sleeve length (adjustable): 46 cm / 18”
Other measurements: Check the Schematic on page 4.
*Note: The length of the body and sleeves are easily modified to suit your own body measurements. I recommend trying the sweater on every now and then while working on it to make sure you get the perfect length for your style. Please be aware that adjusting the lengths of the garment will also affect the amount of yarn needed to finish the project.*
**Gauge**
23.5 sts and 30 rows = 10 cm/ 4”, in stitch pattern on 4.0 mm [US 6] needle, after blocking
*Following instruction for the Back rows 1-32 according to your size to make a swatch, use 4.0 mm [US 6] needle as a starting point for swatching. You don’t need to wash or block the swatch, just steam it, let it relax 2-3 hours then compare gauge.Adjust the needle size until you obtain gauge before starting to knit your cardigan.*
**Needle**
4.0 mm [US 8] or size to obtain gauge with a cable of at least 80 cm [32”] for the main body.
4.0 mm [US 6], DPNs or circular needles with a cable suitable for small circumference knitting for the sleeve and the cuffs
3.5 mm [US 4], circular needles with a cable suitable of at least 40 cm [16”] for the neckband and frontbands.
**Yarn**
Weight 3 [DK yarn/ 11 WPI]
Designed with Peer Gynt from Sandnes Garn (100% Norwegian wool | 90 m [98 yrds]/ 50 grams) x 1090 (1195, 1480, 1605) meters/ 1190 (1310, 1620, 1760) yards OR x 12 (14, 17, 18) skeins.
**Notions**
Locking markers (x 6) & o-ring markers
Stitch holder (use any scrap yarn, spare needle or barber cord, etc.)
Scarp yarn
Tapestry needle
6 buttons ( appro. 2.0 cm / 0.8” diameter)
**Notes**
The SPRING cardigan is knitted from the top down. First, knit the Back piece. Pick up and knit sts from Back shoulder line to knit the Left front piece, the Right front piece, and then join these two parts together to knit the Front. Join the Front piece and the Back piece together to knit the Lower body. Pick up stitches around the armholes to work the Sleeve. Pick up stitches around the neck to create neckband. Then pick up stitches along the Fronts to make button bands.
* 이 도안은 유료이므로 Ravelry에서 별도 구매가 필요합니다.
비슷한 느낌의 도안들
옆으로 밀어서 보기 →Petra Jacket
by PetiteKnit
Fjord Horse Cardigan
by Marit Noor Sæter
Broken Glass Cardigan
by Jane Z.
Olga Jacket
by PetiteKnit
Marfisa Cardigan
by Claudia Quintanilla - EweKnit Toronto
Step by Step Cardigan
by Florence Miller
Mapel
by Martin Storey
Maggie Cardigan
by PetiteKnit
Joye Cardigan
by Martin Storey
Ripplette Blouse and Cardigan
by Jennifer Shiels Toland