도안 목록으로 돌아가기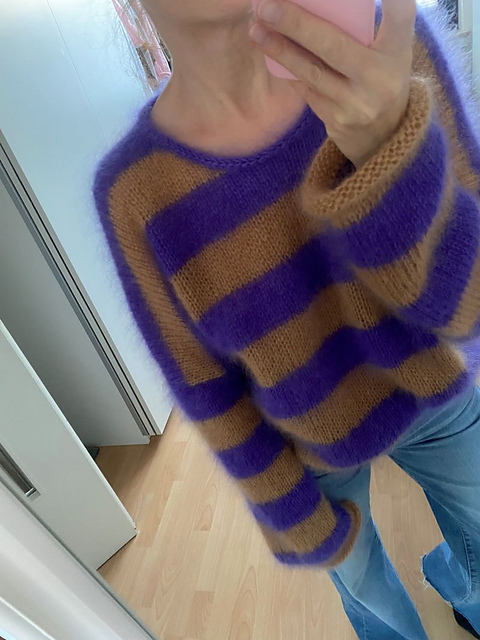
 무료
무료
 무료
무료

Pullover유료 도안
KIRA Jumper
디자이너: Tanja Koenigs
난이도4.0
바늘 크기
6mm
(13호)
실 굵기매우 굵은 실 (소품용)
(Bulky (7 wpi))
(Bulky (7 wpi))
좋아요946
ADVERTISEMENT
도안 상세 설명 구글번역기로 번역하기
**The pattern is available in German, English (description below) and French**
**BESCHREIBUNG**
Der KIRA Jumper ist ein locker geschnittener Basic Pullover mit stark überschnittenen Schultern, Rundhalsausschnitt und schmalen Ärmeln. Das Modell wird von oben nach unten gestrickt.
Der hintere und vordere Halsausschnitt wird mittels Zunahmen geformt und Rücken- und Vorderteil zunächst in Reihen bis zu den Armausschnitten gestrickt. Unter den Armen werden beide Teile verbunden und dann in Runden gestrickt.
Für die Ärmel werden aus den Armausschnitten Maschen aufgenommen und ebenfalls in Runden gearbeitet. Alle Säume werden glatt rechts locker abgekettet, wodurch ein hübscher Rollrand entsteht.
Zum Schluss wird eine Double-Face-Blende am Halsausschnitt angestrickt und anschließend daraus die Maschen für den Rollrand aufgenommen.
Passform **2** von **5**
Schwierigkeitsgrad **2** von **5**
**GRÖSSEN**
XS (32/34) S (36/38) M (40/42) L (44/46) XL (48/50) 2XL (52/54), 3XL (56/58)
Alle Angaben in der Skizze (Anhang 1) und in der Anleitung bedeuten Größe XS (S) M (L) XL (2XL) 3XL
Größenfinder für deinen Brustumfang76-81 (82-89) 90-97 (98-107) 108-119 (120-131) 131-143 cm
**MAßE FERTIGES STRICKSTÜCK** (siehe auch Skizze Anleitung)
Brustumfang: 104 (111) 119 (127) 137 (150) 163 cm
Mehrweite zum Brustumfang: 26 (25) 25 (25) 24 (25) 26 cm
Einfache Breite (nach Abnahmen): 51,5 (55) 58,5 (63) 68 (74,5) 80,5 cm
Einfache Ärmelbreite (nach Abnahmen): 14 (15) 16 (17) 19,5 (21) 22,5 cm
Hintere Gesamtlänge (gemessen ab Schulter): 54 (55) 56 (57) 59,5 (61) 62,5 cm
Das Model auf dem Foto ist 164 cm groß und trägt Größe S bei einem Brustumfang von 85 cm.
**MUSTER**
Grundmuster: glatt rechts (Hinreihe rechts, Rückreihe links), in Runden rechts
Streifenmuster: 1 Streifen = 10 Reihen
**MASCHENPROBE**
*Hinweis: Ich stricke sehr fest, da aber meine linken Maschen lockerer sind als die rechten, habe ich für die Rückreihen ½ Nadelstärke kleiner gewählt, um ein gleichmäßiges Maschenbild zu erhalten.*
2fädig mit Garnvariante 1 oder 3 oder 3fädig mit Garnvariante 2
mit Nadel 6 mm in Hin- und 5,5 mm in Rückreihen bzw. entsprechend der Maschenprobe im Grundmuster (gewaschen): 10 x 10 cm = 14 Maschen x 19 Reihen
**GARN UND VERBRAUCH**
**GARNVARIANTE 1**: ”Suri Alpaca” (100m/25g) in Flieder 19 zusammen mit “Mohair Luxe” (175m/25g) in Neongelb 114 von Lang Yarns
Suri Alpaca 150 (175) 175 (200) 225 (250) 275 g
Mohair Luxe 100 (100) 100 (125) 125 (150) 150 g
mit jeweils 1 Faden je Garn
gesamt: 250 (275) 275 (325) 350 (400) 425 g
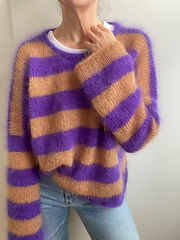
**GARNVARIANTE 2** (uni oder gestreift): ”Pearl Mohair” (210m/25g) in Grape (Farbe 1) und Almond (Farbe 2) von MAJO
Uni: 225 (250) 275 (300) 325 (350) 400 g
mit 3 Fäden des Garns
Gestreift:
Farbe 1 (Grape): 125 (150) 150 (175) 175 (200) 225 g
Farbe 2 (Almond): 125 (125) 125 (150) 175 (175) 200 g
gesamt: 250 (275) 275 (325) 350 (375) 425 g
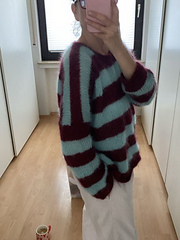
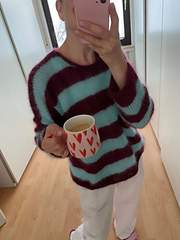
**GARNVARIANTE 3** (gestreift): "Mohair Luxe" (175 m/25 g) in Wein 164 (Farbe 1) und Mint 058 (Farbe 2) von Lang Yarns
Uni: 175 (175) 200 (225) 250 (275) 300 g
mit 2 Fäden des Garns
Gestreift:
Farbe 1 (Wein): 100 (100) 100 (125) 125 (150) 150 g
Farbe 2 (Mint): 100 (100) 100 (125) 125 (150) 150 g
gesamt: 200 (200) 200 (250) 250 (300) 300 g
**NADELN**
• Auswechselbare (wenn Du ebenfalls mit unterschiedlichen Nadelstärken arbeitest) Rundstricknadeln 6 mm und 5,5 mm, mit einem Seil 80 bis 100 cm lang (je nach Größe)
• Kurze Rundstricknadel 4, 5 und 6 mm, 40 - 50 cm (je nach Größe)
• Häkelnadel für den prov. Maschenanschlag
**ZUBEHÖR**
• Insgesamt 4 Maschenmarkierer für die Nadelstärke 6 mm (einen davon in einer anderen Farbe für den Rundenanfang)
• Kontrastfaden in ähnlicher Stärke wie das Hauptgarn für die prov. Maschenanschläge
• extra Seil oder Faden zum Stilllegen von Maschen, Maßband, Wollnadel (stumpf) und Vernähnadel (spitz), Schere
**STRICKTECHNIKEN**
• Provisorischer Maschenanschlag mit Häkelnadel
• Rechte und linke Maschen
• Zunahmen rechts und links geneigt
• Abnahmen rechts und links geneigt
• Maschenaufnahme aus dem Armausschnitt
• Double-Face-Blende
Linksammlung auf [www.lotilda.de/kira-jumper-links][1]
*****************************************************
The KIRA Jumper is an oversized basic sweater with heavily dropped shoulders, a round neckline and narrow sleeves. You will work this sweater top-down.
You will form the back and front necklines with increases, then work the back and front separately to the depth of the armholes. You will connect back and front parts under the arms and work the body in the round.
You will pick up the stitches for the sleeves, around the armholes and work the sleeves in the round. All the edges are bound off loosely in Stocking St, creating a pretty roll.
Finally, you will work a double-knit bind-off or an I-cord to finish the neckline, or you will alternatively pick up stitches for the rolled edge.
Fit **2** of **5**
Difficulty **2** of **5**
**SIZES**
XS (32/34) S (36/38) M (40/42) L (44/46) XL (48/50) 2XL (52/54), 3XL (56/58)
All numbers in the sketch (Appendix 1) and in the pattern refer to sizes XS (S) M (L) XL (2XL) 3XL
To fit actual bust measurements of 76-81 (82-89) 90-97 (98-107) 108-119 (120-131) 131-143 cm
**MEASUREMENTS OF THE FINISHED PIECE**
Bust circumference: 104 (111) 119 (127) 137 (150) 163 cm
Positive ease: 26 (25) 25 (25) 24 (25) 26 cm
Width (after decreases): 51.5 (55) 58.5 (63) 68 (74.5) 80.5 cm
Sleeve width (after decreases): 14 (15) 16 (17) 19.5 (21) 22.5 cm
Total back length (measured from the shoulder): 54 (55) 56 (57) 59.5 (61) 62.5 cm
The model in the photo is 164 cm tall with a chest circumference of 85 cm, and wears a size S.
You can use the blank sketch in Appendix 2 for notes and conversions.
**PATTERN**
Basic pattern: Stocking St (knit on the right side, purl on the wrong side), knit all rounds
Stripe pattern: 1 stripes = 10 rows
**GAUGE**
Note: I knit very tightly, but my purl stitches are looser than my knit stitches. I use a needle size that is ½ size smaller for the back rows, to achieve an even stitch pattern.
In Stocking St, after blocking, with 2 threads of yarn alternative 1 or 3 held together, or 3 threads of yarn alternative 2,
on 6 mm needles for the RS and 5.5 mm needles for the WS: 10 x 10 cm = 14 sts x 19 rows
**YARN REQUIREMENTS**
**YARN ALTERNATIVE 1**: ”Suri Alpaca” (100m/25g) in Lilac 19 held together with "Mohair Luxe" (175m/25g) in Neon Yellow 114 by Lang Yarns
Suri Alpaca 150 (175) 175 (200) 225 (250) 275 g
Mohair Luxe 100 (100) 100 (125) 125 (150) 150 g
1 thread of each held together
In total: 250 (275) 275 (325) 350 (400) 425 g
**YARN ALTERNATIVE 2** (plain or striped): ”Pearl Mohair” (210m/25g) in Grape (Color 1) and Almond (Color 2) from MAJO
Plain version: 225 (250) 275 (300) 325 (350) 400 g
with 3 threads held together
Striped version:
Color 1 (Grape): 125 (150) 150 (175) 175 (200) 225 g
Color 2 (Almond): 125 (125) 125 (150) 175 (175) 200 g
In total: 250 (275) 275 (325) 350 (375) 425 g
**YARN ALTERNATIVE 3** (plain or striped): "Mohair Luxe" (175 m/25 g) in Wine 164 (Color 1) and Mint 058 (Color 2) by Lang Yarns
Plain version: 175 (175) 200 (225) 250 (275) 300 g
with 2 threads held together
Striped version:
Color 1 (Wine): 100 (100) 100 (125) 125 (150) 150 g
Color 2 (Mint): 100 (100) 100 (125) 125 (150) 150 g
In total: 200 (200) 200 (250) 250 (300) 300 g
**NEEDLES**
• Interchangeable (if you also work with different needle sizes) circular knitting needles 6 mm and 5.5 mm, with an 80 to 100 cm long cable (depending on size)
• Short circular knitting needles 4.5 and 6 mm, 40 to 50 cm (depending on size)
• A Crochet hook for the provisional cast-on
**NOTIONS**
• A total of 4 stitch markers for the 6 mm needle (one of them in a different color for the beginning of the round)
• Contrast yarn in a similar weight as the main yarn for the provisional cast-on stitches
• Scrap yarn to leave stitches on hold, a measuring tape, a tapestry needle (blunt) and a sewing needle (pointed), scissors
**KNITTING TECHNIQUES**
• Provisional cast-on with crochet hook
• Knit and purl stitches
• Increases to the right and to the left
• Decreases to the right and to the left
• Picking up stitches on existing stitches (armhole)
• Double knit hem
All links for the techniques in this pattern can be found at: [www.lotilda.de/kira-jumper-links][2]
[1]: https://www.lotilda.de/kira-jumper-links
[2]: https://lotilda.de/kira-jumper-links
* 이 도안은 유료이므로 Ravelry에서 별도 구매가 필요합니다.
비슷한 느낌의 도안들
옆으로 밀어서 보기 →Limones Sweater
by Mateus Mestre
무료Sara's cable knit sweater
by Sara Concas
Arrow Blouse
by Odd Row
무료Step by Step Sweater
by Florence Miller
Colour Me Christmas I
by Kirsten-Michele
Primrose Sweater
by IvoryLoops
Olga Sweater
by PetiteKnit
Ranunculus
by Midori Hirose
Colour Me Christmas II
by Kirsten-Michele
Cloud Sweater
by PetiteKnit